Monday, October 31, 2011

Pumpkin Decorating!

Last year, we decided that instead of carving our pumpkin, we would paint them.  This year, my Mother in law came to visit, and she and Jellybean decorated the pumpkins!  She had brought a kit that had all kinds of neat stuff in it, like pipe cleaners, googly eyes, foam shapes in the shape of mouths, eyes and noses, and of course, stickers!  If you don't have a kit, you can always use whatever craft supplies you have on hand!

Here's what the girls came up with :

Such a happy little guy!

Zorro pumpkin!


This one if my favorite!  I love how surprised he looks :)


HAPPY HALLOWEEN!!!


Pumpkins

I just had to post this one to show off our Pumpkin creation!!  We went onto a search engine online and typed in "Pumpkin Carving Templates" and found a whole bunch we could print off!  We let our daughter choose, and this is what she came up with:

Supplies Needed

SHARP knife
Pumpkin
Carving template


1.  Cut the lid off of your pumpkin in the shape of your choice.  We chose to do it in kind of a flower shape.  Make sure you cut your hole large enough to reach in to scoop the seeds and bits out, but also taper it so that the lid won't fall into your pumpkin like mine did :)  Just angle your knife a bit as you carve it inwards.


2.  Pick your template online and print it off. Make sure your design isn't too big for your pumpkin or it won't look right when you pop a candle in there.


3.  Using the tip of your knife or a pin, make a series of dots as the outline that you will cut. It's hard to see it in this picture, but that's what we did here.


4.  VERY carefully cut your shape.  By using your knife tip or a pin to outline your shape, it is WAY easier to cut that way instead of trying to do it freehand.  I used a larger knife for the bigger shapes, and I used a very small, thin paring knife for the fiddly bits.  There are a TON of kits that you can get at the Dollar Store or your local big Box store that have tiny little pumpkin carving knives in it.  When you are carving, be VERY careful that you don't cut over the lines that are there to hold things together.  Or, you will end up having to tape your pumpkin back together :)  When you use an intricate design, there will be bits that you cut around that will make the shape your are creating, and will also hold your shape together.  I tried to glue Minnie's jaw back on, but of course glue on a wet pumpkin just wasn't going to work.  So because we're using a battery-powered candle and not a real one, I used some clear tape to hold it back together :)


HAPPY HALLOWEEN!!!!


Halloween!

I know we're cutting it close to the wire on this post, but I wanted to post some of the fun Halloween things we've been doing!


HOMEMADE (AND SUPER CHEAP!!) DECORATIONS:

Supplies Needed
1 Dollar Store :)

Foam shapes (We used Frankenstein, ghosts, bats & pumpkins)
Small, blank paper or white plastic bags
Felts, crayons, pencil crayons
Googly eyes
Halloween Stickers
Anything sparkly and fun!


1.  Pick out foam shapes
2.  Attach your mediums of choice (beads, glitter, stickers etc.)
3.  Hang them up! 


I got these ghosts at the Dollar Store, and they are awesome!  You could very easily make these at home with a paper or white plastic bag.  We filled ours with tissue paper, but you could use newspaper or even leaves from your yard.


We chose to hang our little foam creation up with masking tape on the wall of the house leading up to the front door.


Very spooooky!!

Monday, October 17, 2011

Water Play

Well, it has been a very eventful few weeks!  We've had more illness in the family, and we've also had company staying with us since the end of September, so we haven't been able to post as often!

So here's what we've been up to:

Jellybean started Preschool this year.  It was so strange to see my little girl in her backpack all ready to leave me behind, but it was great to see how independant she has become!  She didn't notice at all when I left, she just went right in and started to play.  It was great, although a small part of me wanter her to cry, just a little!  Along with her newfound independance, we have also discovered some newfound attitude, with a capital A!  It has been such a challenge to stay calm and relaxed with her, when sometimes I'm ready to pull my own hair out!  How do you deal with a cantankerous toddler?  I'm always open to new thoughts/ideas, and I'd love to hear how other mamas deal with this stage!!

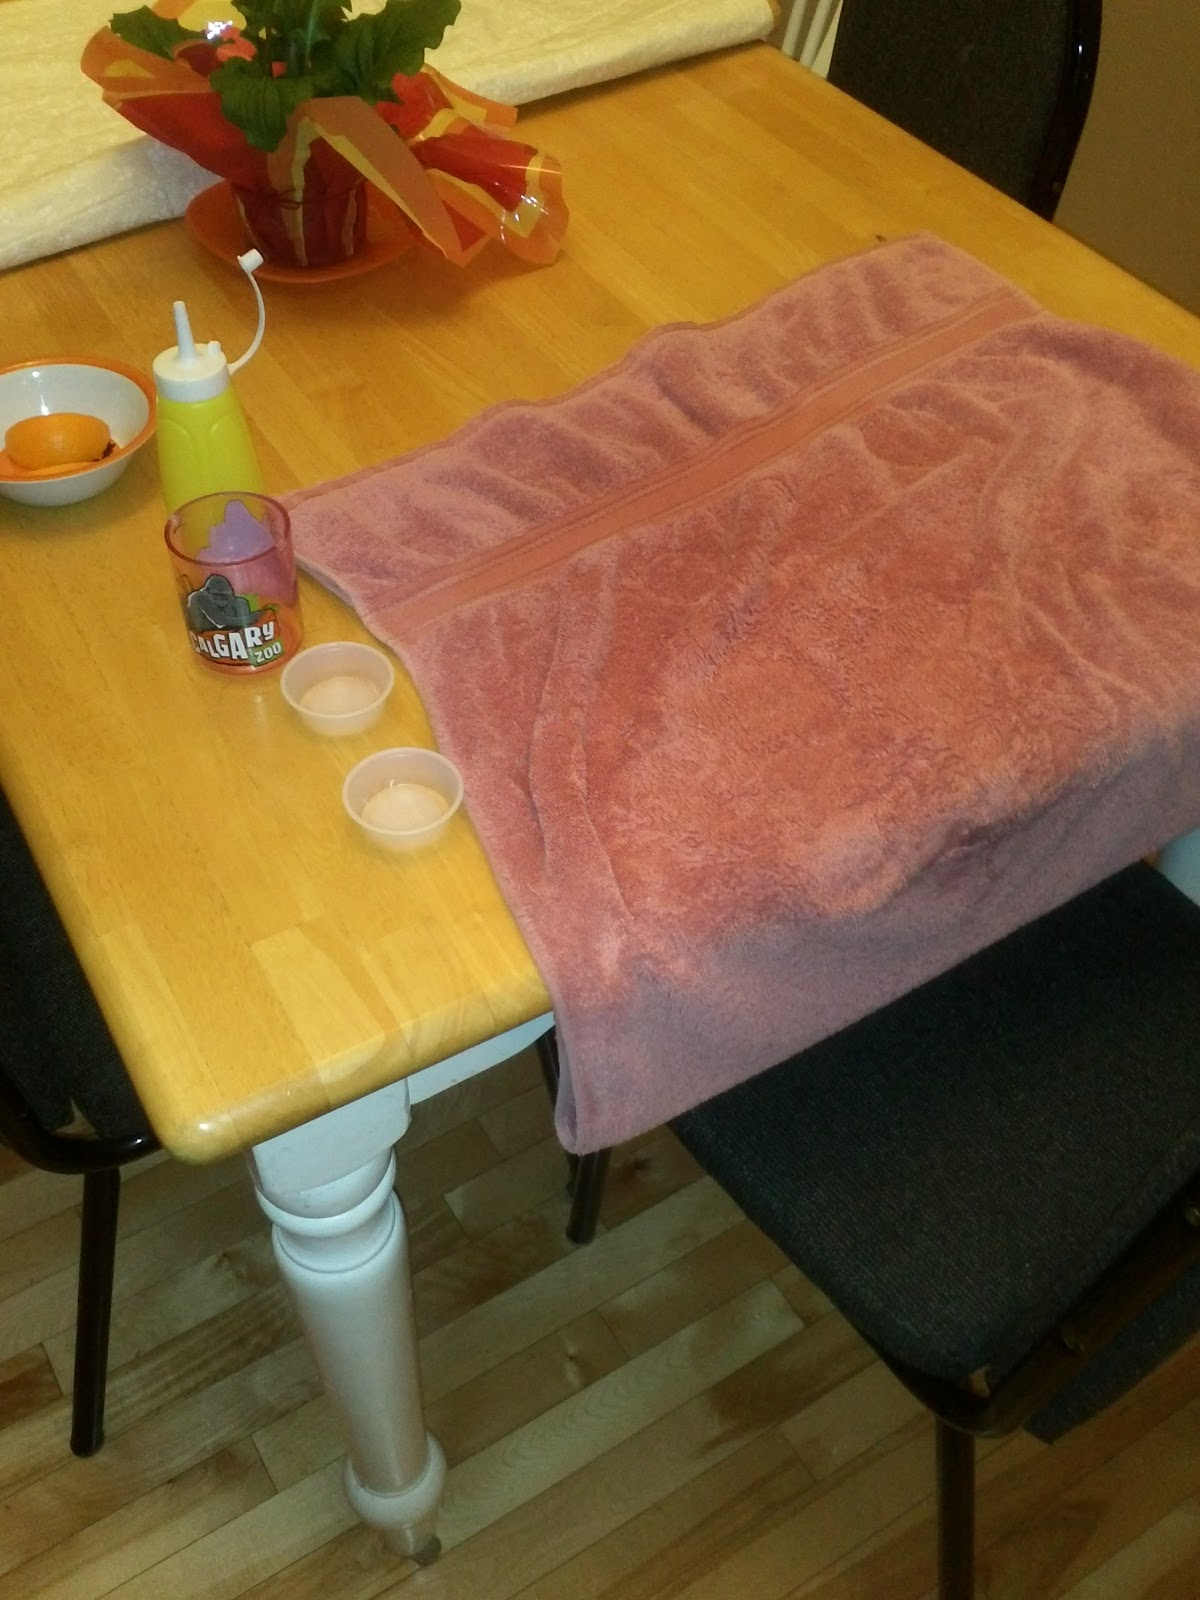
In other news, we've been experimenting a lot.  Jellybean LOVES playing with different mediums, and her current favorite is water.  So we set her up at the table with a towel and some different tools and she had a blast!


What We Used
Two plastic cups (they're from Edo Japan for soy sauce with your sushi, but we reused them!)
A plastic cup
A picnic mustard bottle (I got these at the Dollar Store, I think they were 2 for $1)
Plastic bowls
A Towel


1.  Spread your towel.  If you're doing this outside, it doesn't matter if you use the towel as much, but as we did this in October when it was only 2 degrees outside, we decided a towel was a must!
2.  Give your child his/her "tools" and let them have at it!  You could also use an old dish tub for more play!  Jellybean loved squirting the water from the mustard bottle into the little cups, and then from the little cups into the bowl.


This activity is fantastic for gross and small motor skills, and it's also great for hand/eye coordination.  Don't be afraid of a little mess!  At least your floors will be nice and clean when your kids are done!  :)