Sunday, August 28, 2011

I'll Huff...and I'll Puff...And I'll Paint!

Today we found a recipe from Play At Home Mom for Puffy Paint and decided to try it out!  It was really easy to make, and Jellybean LOVED it!  She had a blast using a plastic knife and a paintbrush and cardboard squares to paint, and even got her hands in there, too!

Supplies Needed  
1/2 Cup Flour
2tsp Baking Powder
2tsp Salt
Food Coloring
Water
Bowl
Cardboard Pieces


1.  Mix the fist 4 ingredients together with enough water to make a smooth, paintable paste.  


2.  Start playing!  You can either leave your paint in the bowls, or you can put them into squirt bottles (I got some at the Dollar Store, 2 for $1).  Apply your paint to pieces of cardboard and have fun!  You can use the squirt bottles, dabbers, paint brushes, your hands, whatever works!

3.  Place your cardboard in the microwave for 10-30 seconds.  For some areas with thick, thick paint, I put it in for an extra 10 seconds or so.  

4.  Voila!!

Look how puffy!!


Final product!!

Friday, August 26, 2011

Sun Catchers

A little glitz, a little sparkle; these sun catchers are sure to lighten up even the cloudiest of days!

Supplies Needed


Cheese Grater
Paper 
Pencil
Scissors
Single Hole Punch
Crayon Gratings
Glue
Sparkles
Iron
Old Towel/Washcloth
Wax Paper
Felts/Crayons

1.  Choose the shape you want to make.  You can either cut out your shape from paper, or use a premade template.  I found mine at the Dollar Store, and it was 12 for $1.25. 

2.  Using a cookie cutter as a template, cut out a circle from the middle of your shape *hint:  Make your shape at least 1" larger all around than your cookie cutter size*

3.  Use the single hole punch to make a hole in the center of the area you're going to cut out.  *hint:  you could also use a pencil or the tip of your scissors to make a hole to start your cuts*

4.  Cut the shape out of the middle.

5.  Grate some crayons (this is a great way to use up those broken or cheapo crayons!!).  I picked up a simple grater at the Dollar Store and just grated while Jellybean napped.  I did a couple of different colors and stored them in zip top bags.  MAKE SURE YOU DO NOT STORE YOUR GRATINGS IN A HOT PLACE!  Areas that get direct sun or get SUPER hot will make your gratings melt into a giant blob :)

6.  Cut out circles of wax paper that are about 1/2" larger than the hole you cut in the center of your paper.  Do two per sun catcher.

7.  Take a small sprinkling of your crayon gratings and place them on one of the wax paper circles.  *Note:  If you use multiple colors, it can sometimes turn your suncatcher brown when the wax melts :)*

8.  Place your wax paper circle with the crayon gratings onto an old pillowcase or dishcloth and place your 2nd wax paper circle on top.

9.  Fold the pillowcase or dishcloth over on top of the wax paper circles, being careful not to move the top wax paper circle, so that the wax paper is sandwiched between the two layers.

10. On a high setting, gently iron small circles over your wax circles.  This will melt the crayon and adhere the two wax paper circles together.  Be careful that you don't have too many crayon gratings in there, or you they will ooze out the side as you iron and will make a goopy mess.


11.  Let it cool for 1 minute, then place a layer of glue around the outside edge of the circle.  Place in the middle of the circle you cut out of your paper shape.

12.  Let your little one decorate the shape.


After Jellybean was done coloring hers, I put some glue on it and added some glitter for some extra sparkle!

13.  Enjoy!!

***NOTE OF CAUTION!!***  Depending on what you use to sandwich your wax paper as you iron, you may run the risk of having it ooze through and get onto your iron.  Make sure you either use an iron that is just for crafting, or clean it well after you do this, before you iron your husband's good shirts!!  (You could also place a layer of newspaper on top of your wax paper to prevent this).  

Friday, August 12, 2011

Whooo...Whooo...

Jellybean has a love of birds, so we decided to make our own owl :)  It was really easy and fun, and actually turned into a craft that lasted for 2 days as everything dried.  She loves it!


Supplies Needed
Brown paper lunch bag
Feathers
Googly eyes
Sparkles
Glitter
Glue
Sequins
2 different sheets of colored paper

1.  Cut out 2 circles for the owl's eyes
2.  From a different colored paper, cut out 1 large triangle for his beak, and two feet.
3.  Turn your bag upside down so that the fold of the bottom of the bag is facing up.  Glue your beak so the triangle is upside down in the middle near the bottom of the fold.  Glue the feet down at the bottom of the bag.


4.  Glue your eyes on either side of the triangle, then glue your googly eyes into the center of the circles.
5.  Start decorating!  Let your little one run wild as they decorate their owl!  We used glitter, glitter glue, sequins and sparkles.
6.  Let it dry for at least a couple of hours until everything is dry.
7.  Turn your owl over and spread glue on the back to adhere the feathers.  I let Jellybean do the glue, and then she arranged the feathers wherever she wanted them!

Thursday, August 11, 2011

Sidewalk Paint


With these beautiful Alberta days, Jellybean has been begging to go out and play!  She loves to play with her sidewalk chalk and she loves to paint, so we found this recipe and tried it out!  I like it because it is biodegradable and eco-friendly, and clean up is a breeze on both sidewalk and Jellybean!
I found this recipe at Busy Bee Kids Crafts, and it worked really well!


Supplies Needed
1/4 Cup Corn Starch (per color)
1/4 cup water (per color)
8-10 drops of food coloring
Paint Brushes
Bowls (1 per color)
Other implements (craft sticks, plastic spoons etc.)


1.  Mix together your corn starch and water.  Add the food coloring.  I mixed these right in the bowls.  You will notice that it seems to be quite runny, but it does thicken up over use.  Make sure to stir right away or your corn starch will clump and make it harder to use.  If you find it stiffening up, just stir it some more!  I used blue, green, red and yellow, and Jellybean painted with a spoon, a plastic rake, her hands and feet and her paint brushes.  


We started out with paint brushes...

Then we discovered neat patterns and designs when we dumped the paint.  Jellybean loved running her hands over the piles of paint as it creates a smooth, puffy finish.  And of course, no painting is complete without a rock!  She had fun using the rock to scrape the paint off.  It left a fairy dust of chalk-like powder that was also fun to smear around!
And of course, we HAD to splatter the paint with our fingers and brushes!


2.  When you're done, get out the hose and wash your art away!  I was surprised at how cleanly it all washed away!

Sunday, August 7, 2011

Bird Seed Biscuits

Today we decided to take a lesson from the Scott School, and we made birdseed biscuits!!  Jellybean LOVES seeing all of the birds in our backyard (we get a lot of robins and magpies), so we decided to attract some more.

Supplies Needed
3/4 cup birdseed (I got a HUGE bag of it for $5 from Wal Mart)
1 tablespoon flour
2 tablespoons water
Cookie Cutters
Cookie Sheet
Tin Foil
String or ribbon for hanging
(Makes 2 biscuits)


1.  Mix together your seeds, flour and water in a small bowl.
2.  Grease the inside of your cookie cutters and press your birdseed into your shapes.
3.  Insert your straws near the top of your cutters as a place to put your ribbons
4.  Bake in the oven on a foil-lined cookie sheet at 170 degrees for 1 hour


This was our final product


There are a few things that I didn't do that I wish I had.  
  1. Pat down your birdseed quite firmly to ensure your biscuits stay together
  2. I didn't use foil on my cookie sheet, but I wish I had.  A few of the biscuits stuck and they fell apart when I tried to move them.
  3. Make sure you don't place your straws too close to the top of your biscuit or you run the risk of them falling apart when you hang them.


This was a super fun project, and now that we've tried it once and worked out the kinks, we're totally going to do it again!  Thanks for the idea, Scott School!!

Friday, August 5, 2011

More Fun With Lentils!

I saw this on No Time For Flash Cards, and loved it!  We did this craft right away, and Jellybean had such a good time with it that we are definitely going to do it again!


Supplies Needed
Dried Lentils
Construction Paper Shapes
Glue
Scissors

1.  Cut out different shapes from Construction Paper.  We chose flowers.

2.  If your little one is old enough to use glue, have her squeeze glue onto the paper.  Jellybean wasn't quite ready for that, so I tried to squeeze different shapes onto the paper.

3.  Let your LO place the lentils on the glue.  I tried to have her do it one at a time for fine motor skill practice, but she had more fun just dumping them on :)

4.  Let them dry and them hang them up!  Make sure that when they are dry that you give them a shake over a bowl or back into your container, otherwise you will have loose lentils all over the place!


Wednesday, August 3, 2011

Sensory Play

Sensory play is so important for little ones.  They learn so much through their senses, and by doing sensory activities where they can dig their hands in and squish things and move them around and see how things move and smell them and even taste them, millions of synapses in their brains start firing, which is a huge step to helping them learn!  Many people already do sensory activities with their children like singing to them and swaying and rocking them, hanging mobiles above beds and cribs, reading books etc.  Some other things that you can do for your kids is creating sensory tubs.


We did our first one a few weeks ago with Jellybean, and it was amazing watching her.  You can do it with anything:  Shaving cream and food coloring, dried beans, lentils etc., water and sponges, popcorn, water beads, you name it!  Whatever you can cram in there that's safe for your kids, do it! (Just make sure that you are supervising while they play to avoid choking!)

We used an old dish tub (actually it wasn't old, I got it for $1 at Dollorama!) and poured in dried lentils, and then gave her different things to scoop and pour with, like a plastic spoon, plastic cups, egg poaching cups, etc., and she had a blast.  When we did our colored pasta last week, we poured everything into a metal casserole pan (the disposable kind from the dollar store) and let her play.  

It was great not only for sorting because she sorted the wheels from the long tubes, but it was also awesome for sensory play because she got to stick her hands in and rattle the pasta in the tin, she practiced pouring them from a cup into the tin and from cup to cup, and then, of course, all the long noodles ended up on her fingers!!

This was awesome as well because she went back to it day after day.  We stored the lentils in a rubbermaid with a tight lid and put it on our craft shelf in the kitchen, and she kept coming back to it and pulling it out and dumping the lentils.  We left the pasta loose in the tin, and I'd hear noises from the kitchen and say "Jellybean what are you doing?"  "I doing nothing, Mama!"  I'd then go into the kitchen and find her filling up her cups with noodles!  I walked in yesterday and she'd lined up the tubes!!

Sensory tubs are a great way to teach your child, and there are so many different variations that you will never run out of things to do!!

Mushroom Counting

Jellybean has been working very hard to learn her numbers.  She is able to point to her fingers and toes and count to ten, so I wanted to start doing some number recognition with her, and was really excited when, while checking out some other awesome blogs, I discovered this fun craft!  Now, I can't remember where I found this particular one, but I've seen it done as ladybugs and worms and apple trees.  You can really let your imagination go!

Supplies Needed
2-3 different colored papers
Scissors
Glue Stick
1 Sheet White Paper
Colored Dots


1.  Determine how many mushrooms you want to make.  We chose to make 10.  
2.  Cut out the mushroom "stems" out of white paper, one piece for each mushroom.  
3.  Write the numbers 1-10 on the bottom of each white paper.
4.  Cut out the corresponding number of mushroom "tops" out of your colored paper.  I made a small one for 1 and 2, medium sized ones for 3-6 and large ones for 7-10.
5.  Cut out your colored dots.  I used a piece of scrapbook paper that had a circular design.  This was very time-consuming, so when we do this again, I will either buy the large dot stickers from Staples, use different stickers that we have on hand at home, or have her draw them on herself.
6.  Start assembling!  If your Little One is able to use a glue stick, he/she can glue the stems to the mushroom tops.  If not, give them a hand.  This was Jellybean's first time using a glue stick by herself!

 
7.  Start gluing on those dots!  I started by pointing out the number at the bottom and telling her what it was, and then I handed her  pile of dots that she got to count out for each mushroom.  Then we counted together when they were all glued on.  She also liked lining them up in order according to number, and we also lined them up smallest to biggest.

This craft is not only good for number recognition, it's also for fine motor skills and hand-eye coordination.  I found that Jellybean got a little bit bored part way through, so I think that next time instead of doing 1-10 all at once, we'll maybe do 5, take a break and do something else, then do the last 5.

Have fun!

Tuesday, August 2, 2011

Makin' Pom Poms

Jellybean has had this HUGE obsession with Pom Poms for awhile now, so I decided to do a craft with her that I remember doing with my mom; home made Pom Poms!

Supplies Needed
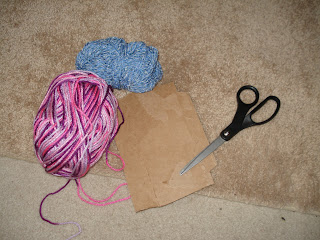
Yarn (I used 4 different colors/types)
Scissors
2 pieces of heavy cardstock or cardboard


1. Cut 2 circles out of your cardboard.  (You can use a circular cookie cutter or something similar as a template if need be.).  You need these to be the same size/shape.

2.  Cut out a smaller circle from the middle of each circle so you have a donut shape.

3.  Cut a long length of your yarn.  Hold the end against the cardboard and start wrapping your yarn around the cardboard.

4.  Continue wrapping your yarn.  I did about 5 layers with mine.  

5.  Insert your scissors under the layers of yarn between the two layers of cardboard.  Cut all the way around your circle, making sure that you hold on to the layers of yarn, or else you'll have many little bits of yarn falling all over your floor!


6.  Take a long piece of yarn and tie it around the layers of yarn between the two pieces of cardboard.
7.  Tie a couple of very tight knots to hold everything in place; the tighter, the better!  Pull the yarn as tight as you can without breaking it.  This will keep everything in place.  

8.  Remove your cardboard and fluff your yarn, and you've got a beautiful Pom Pom!  


NB:  This craft definitely requires adult help/supervision, and is not recommended for kids under 3 to do/play with as there is a chance that yarn bits may come out of the Pom Pom and become a choking hazard.  

Monday, August 1, 2011

Fairy Princess Wands

This craft is one that Grandma did with Jellybean when we were on holidays.  It is super simple to do, and I love it because it uses things that I usually readily have on hand!

Supplies Needed
2 large craft sticks (the ones that look like tongue depressors) 
various lengths of multicolored ribbons
Glue

1.  Have your little one decorate the craft sticks (we didn't do this with Jellybean, but it would be a fun, tactile activity for your little one!)

2.  Cut your ribbons to various lengths and sizes.  When we did this at home, we found lots of ribbons in our wrapping paper drawer from old Christmas and birthday gifts.

3.  Attach your ribbons using glue to one end of one craft stick.  

4.  Glue your second craft stick on top of the other one so that the ribbons are sandwiched in between the two sticks.  We used lots of glue to hold them together, then we wiped down the edges if any oozed out.

5.  Allow to dry for 1 hour 

6.  Play!  Your little Prince or Princess will love the magical fairy wand!!


The little legs in the picture belong to Jellybean, who was most excited that I was holding her fairy wand!!